
Why Sweet Potato Fries Are Life
Let’s be real—regular fries are great, but oven-baked crispy sweet potato fries? They’re in a league of their own. They’re crunchy on the outside, fluffy inside, naturally sweet, and, dare I say, borderline addictive. And before you roll your eyes, no—you don’t need to deep-fry them or own some fancy air fryer contraption. You just need your oven, a little patience, and a few tricks I’m about to spill.
Now, full disclosure: I used to mess these up all the time. Either they came out soggy (ugh) or they turned into shriveled burnt sticks. But after testing (and eating) my fair share, I’ve cracked the code. So if you’ve ever wanted to master the art of crispy sweet potato fries without turning your kitchen into a fast-food joint, stick with me.
The Science (a.k.a. Why Yours Keep Turning Mushy)
Before we get cooking, let’s geek out for a sec. Sweet potatoes have more natural sugar and water than regular potatoes. That means they caramelize quickly but also steam themselves into limp sadness if you don’t prep them right. Ever pull out a tray of fries that look roasted but collapse into floppy orange noodles? Yeah, that’s the water talking.
So here’s the key: get rid of excess moisture and use starch to your advantage. A little cornstarch works like a charm—it creates a barrier that lets the fries crisp while keeping that soft center intact.
Ingredients You’ll Need
Honestly, you don’t need a mile-long shopping list. Here’s what makes the magic happen:
- 2–3 medium sweet potatoes (the kind that feel heavy for their size)
- 2 tablespoons cornstarch (your crispiness insurance)
- 2–3 tablespoons olive oil (avocado oil also slaps)
- Seasonings of choice: paprika, garlic powder, salt, pepper, cayenne if you like heat
- Optional garnish: chopped parsley, parmesan, or even a drizzle of hot honey
That’s it. No unicorn dust. No mystery packets. Just pantry staples.
Step-by-Step Instructions
Step 1: Cut Them Like You Mean It
Cut your sweet potatoes into even matchsticks. And I mean even. If some are thick and some are thin, guess what? Half will burn while the others are still steaming. IMO, the best size is ¼-inch thick sticks—they crisp without drying out.
Step 2: Soak the Fries
Yep, you read that right. Soak those babies in cold water for at least 30 minutes (an hour if you’ve got the time). This pulls out excess starch and stops them from sticking together like clingy toddlers. Drain and pat dry thoroughly—moisture is the enemy here.
Step 3: Toss With Cornstarch
Throw the fries in a bowl and sprinkle on the cornstarch. Shake it around until every fry looks lightly dusted. This is the magic dusting step that separates “meh” fries from the crispy legends.
Step 4: Oil + Seasoning
Drizzle with oil, toss with your seasonings, and make sure everything gets evenly coated. Don’t dump too much oil or you’ll end up roasting instead of crisping.
Step 5: Space Them Out
This is the dealbreaker. Don’t overcrowd the pan. Fries need breathing room. If you pile them up, they’ll steam and turn soggy. Use two baking sheets if you have to. Spread them in a single layer with space in between.
Step 6: Bake + Flip
Bake at 425°F (220°C) for 15 minutes, flip, then bake another 15–20 minutes. You’ll know they’re done when the edges get those gorgeous crispy-brown bits.
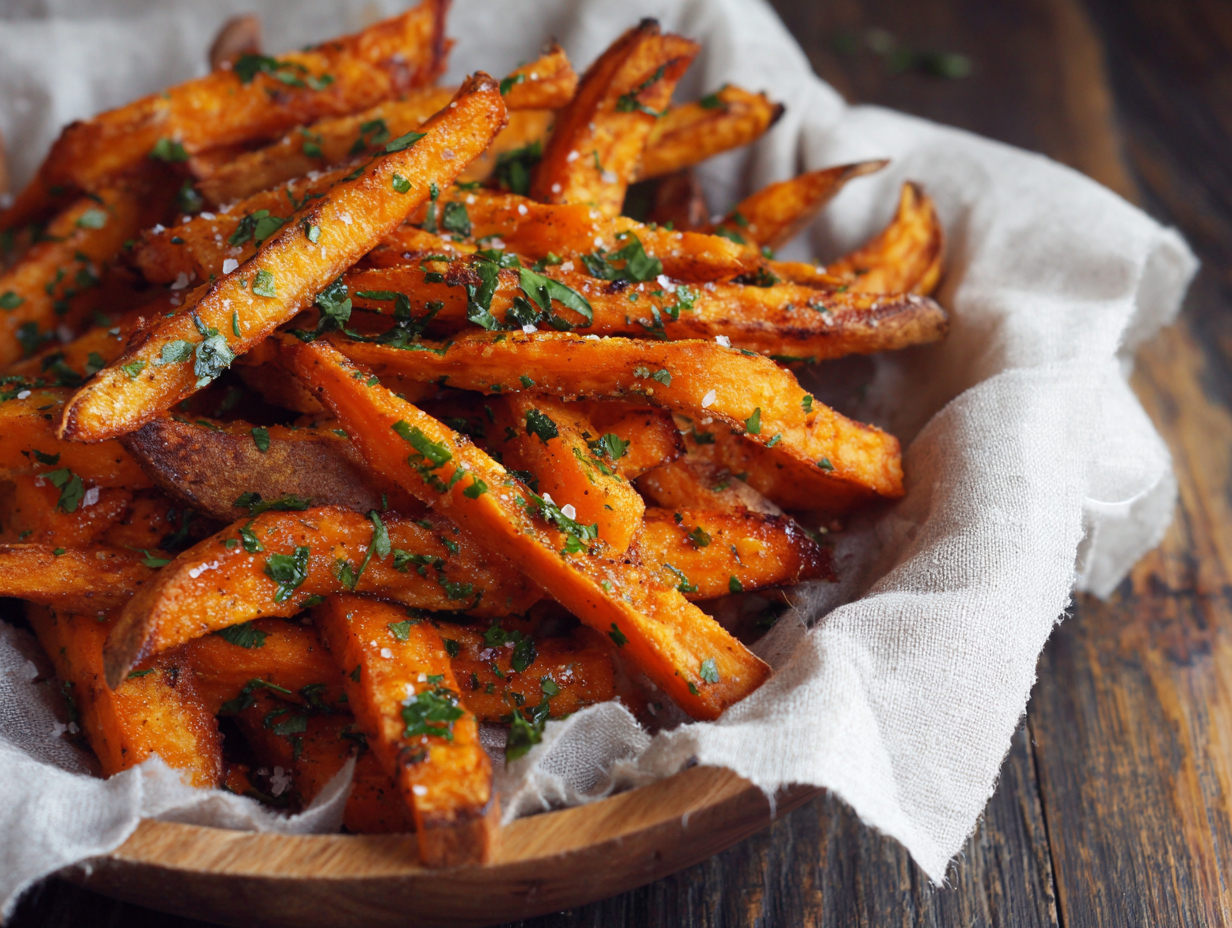
Step 7: Garnish & Devour
Sprinkle with parsley, parmesan, or go rogue with sriracha mayo. Eat immediately because, let’s be honest, these fries don’t last long anyway.
Pro Tips for Crispy Success
- Preheat your oven fully. Don’t rush it. A hot oven is non-negotiable.
- Use parchment paper. Foil makes them stick, parchment lets them crisp.
- Go easy on oil. Too much = soggy. A light coating is perfect.
- Flip only once. Don’t babysit them, just give them one solid flip.
Flavor Variations (Because Why Not?)
Sure, plain salted fries are great, but variety is the spice of life:
- Smoky Paprika Fries – Toss with smoked paprika, garlic powder, and a touch of cayenne.
- Parmesan Herb Fries – After baking, sprinkle with grated parmesan and fresh parsley.
- Sweet & Spicy – Drizzle hot honey or toss with chili flakes.
- Cajun Fries – Use a Cajun seasoning blend for that kick of Southern heat.
Common Mistakes to Avoid
Ever wondered why your fries flop even when you “follow the recipe”? Here’s what usually goes wrong:
- Cutting unevenly. Consistency = even cooking.
- Skipping the soak. That step isn’t optional. Without it, you’re in soggy-ville.
- Overcrowding the pan. Steam is the enemy of crisp.
- Using too much oil. You’re not frying; you’re baking. Big difference.
Why These Fries Are Better Than Fast Food
Look, I love a late-night fry run as much as anyone, but oven-baked sweet potato fries hit different:
- Healthier. Less oil, more nutrients (sweet potatoes are loaded with vitamin A).
- Customizable. You decide the flavor profile, from savory to sweet.
- Cheaper. A bag of sweet potatoes costs way less than drive-thru fries.
- Way less guilt. You can eat a mountain of these and still feel kinda virtuous.
Plus, you don’t end up with that mystery aftertaste that comes from fast-food oil that’s probably older than your car.
Dipping Sauces That Slap
Don’t let your fries go naked. Pair them with:
- Spicy Sriracha Mayo – mayo + sriracha + lime juice
- Garlic Aioli – mayo + minced garlic + lemon juice
- Honey Mustard – mustard + honey + dash of vinegar
- Chipotle Ranch – ranch + chipotle powder or adobo sauce
Or go classic with plain ketchup. No shame.
Final Thoughts
So there you have it: oven-baked crispy sweet potato fries that actually turn out crispy. No soggy disasters, no frying mess, no giving up halfway through and ordering takeout. Just perfectly golden, crunchy fries straight out of your oven.
And honestly? Once you master these, you’ll never look at sad, floppy fries the same way again. Make a batch this week—you’ll thank yourself later. And hey, if you end up eating the whole tray solo (been there, done that), just tell everyone it was “recipe testing.” 🙂