
The Sweet Life With Zero Baking
Let’s be real—sometimes you want dessert, but the thought of preheating an oven, measuring flour, and risking the whole “oops, my cookies turned into rocks” situation feels like way too much. That’s where No-Bake Chocolate Oreo Truffles swoop in like dessert superheroes. They’re rich, chocolatey, creamy, and fancy-looking, yet they secretly take about as much effort as making instant noodles.
I’ve been making these truffles for years, and every time I bring them to a party, people act like I’ve spent hours in the kitchen when in reality, I spent maybe 15 minutes smashing cookies with a rolling pin. (Pro tip: smashing Oreos is surprisingly therapeutic.) So, if you want an easy treat that makes you look like a dessert wizard, you’re in the right place.
Why You’ll Fall in Love With Oreo Truffles
These little bites aren’t just about chocolate and cookies—they’re about dessert glory with minimal effort. Here’s why they’re basically irresistible:
- Zero oven time – Perfect for when it’s 100°F outside and your AC is already crying.
- Three ingredients – Oreos, cream cheese, and chocolate. That’s it.
- Crowd-pleasers – These disappear faster than chips at a Super Bowl party.
- Customizable – Change the coating, add sprinkles, drizzle caramel, or make them festive for the holidays.
Honestly, if you can crush cookies and stir, you’ve already mastered 90% of the process.
What You’ll Need (a.k.a. the shortest shopping list ever)
For the classic version:
- 1 package of Oreos (around 36 cookies, but if you sneak a couple, I won’t tell)
- 8 oz cream cheese (softened—because mixing cold cream cheese is a workout nobody asked for)
- 12 oz semi-sweet chocolate chips or candy melts (for dipping)
Optional but highly encouraged extras:
- White chocolate drizzle
- Sprinkles, crushed candy canes, or sea salt flakes
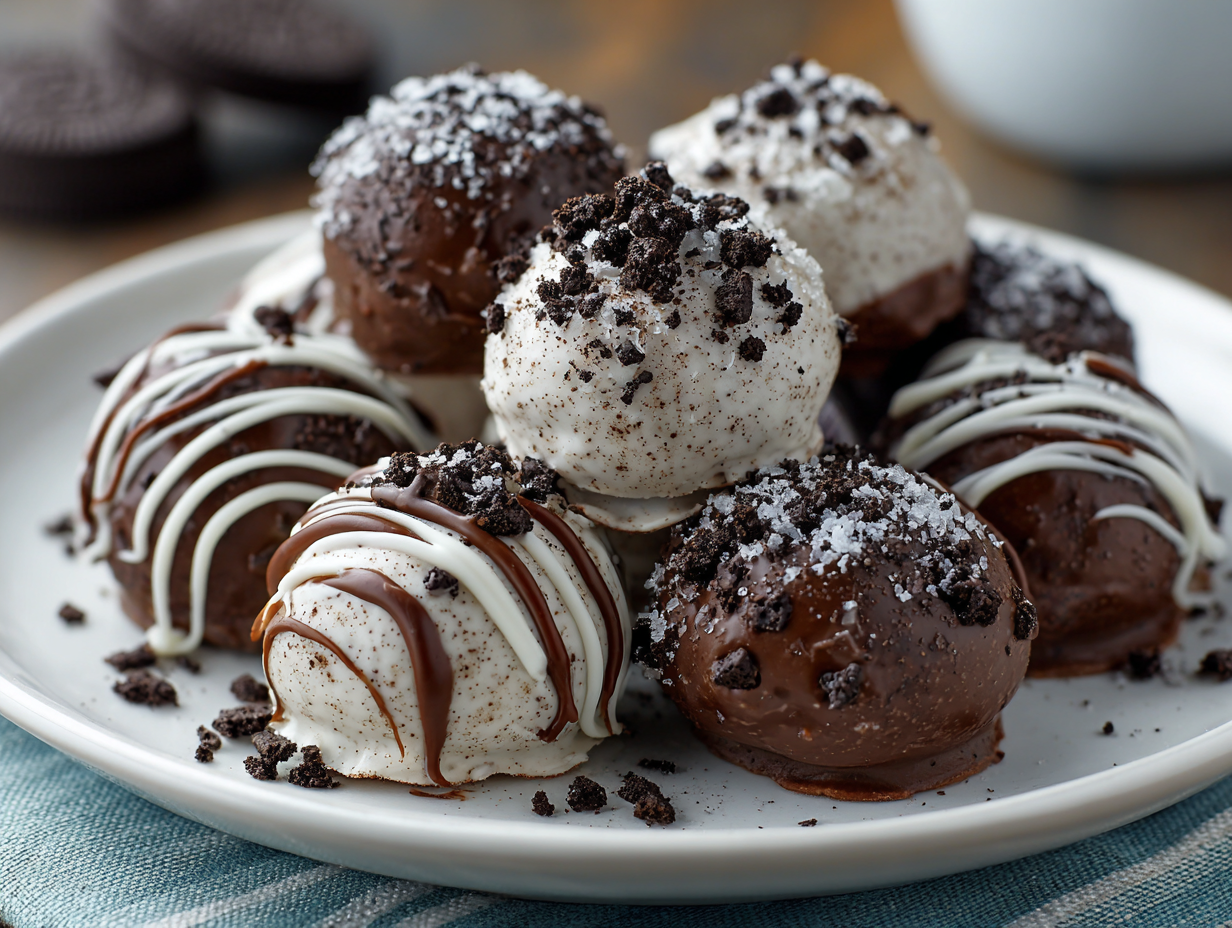
- Crushed Oreos for garnish (Oreo on Oreo—double the fun)
Step-by-Step: How to Make No-Bake Oreo Truffles
Step 1: Destroy the Oreos
Toss all the Oreos into a food processor and pulse until you’ve got fine crumbs. If you don’t own a food processor, put the cookies in a zip-top bag and smash them with a rolling pin. It’s cheap therapy and dessert prep rolled into one.
Step 2: Mix in Cream Cheese
Add softened cream cheese to the crumbs and mix until you get a sticky, dough-like consistency. Yes, it will look like mud. No, it doesn’t matter—it’s delicious mud.
Step 3: Roll Into Balls
Scoop about a tablespoon of the mixture, roll it between your palms, and place the balls on a baking sheet lined with parchment paper. Try to make them roughly the same size unless you want a “guess which one is a golf ball” situation.
Step 4: Chill Out
Pop the tray into the freezer for about 15–20 minutes. This helps them firm up so they don’t fall apart when you coat them in chocolate.
Step 5: Dip in Chocolate
Melt your chocolate in the microwave (short bursts, stir often) or using a double boiler. Dip each ball into the melted chocolate using a fork or toothpick, then let the excess drip off before setting them back on the parchment.
Step 6: Decorate Like a Pro
Before the chocolate sets, sprinkle with crushed Oreos, drizzle white chocolate, or throw on some sprinkles. Instant Pinterest-worthy vibes.
Step 7: Chill Again
Refrigerate until firm, about 30 minutes. Congrats—you’ve just made truffles that could trick anyone into thinking you trained at a fancy chocolatier school.
Common Mistakes to Avoid
Even though these truffles are practically foolproof, here are a few “rookie mistakes” you’ll want to dodge:
- Using cold cream cheese – It won’t mix properly and you’ll end up with Oreo clumps that don’t stick.
- Overheating the chocolate – Burnt chocolate smells like sadness. Always melt slowly.
- Skipping the chill step – Warm truffle balls + melted chocolate = messy disaster.
- Not working quickly enough – Chocolate sets fast, so dip and decorate without procrastinating.
Fun Variations You’ve Got to Try
The beauty of Oreo truffles is how customizable they are. Once you nail the base recipe, you can play around:
- Peppermint Oreo Truffles – Add crushed candy canes for a holiday vibe.
- Peanut Butter Oreo Truffles – Mix a spoonful of peanut butter with the cream cheese.
- White Chocolate Raspberry Truffles – Use golden Oreos, dip in white chocolate, and drizzle raspberry sauce.
- Espresso Oreo Truffles – Stir a little instant coffee powder into the mix for a mocha kick.
Basically, if you can imagine a flavor combo, you can probably truffle-fy it.
Are Oreo Truffles Freezer-Friendly?
Absolutely. In fact, I recommend it. Once they’re set, you can freeze them in an airtight container for up to 2 months. Just let them sit at room temperature for about 10–15 minutes before serving. So yes, you can have emergency truffles on hand at all times—which, IMO, is peak adulting.
Pairing Ideas: Because Dessert Loves Company
Sure, you can eat Oreo truffles straight from the fridge at midnight in your pajamas (been there, done that). But if you want to get fancy:
- With coffee – The bitterness balances the sweetness.
- On an ice cream sundae – Oreo truffles as ice cream toppings = genius.
- With champagne – Because nothing says “I’m classy” like popping bubbles with truffles.
FAQ: Truffle Talk
Do I need to use real chocolate, or will candy melts work?
Both work fine. Real chocolate tastes richer, but candy melts give you that smooth, shiny coating with less fuss.
Can I make them ahead of time?
Yep! Make them a day or two before, store in the fridge, and they’ll still taste incredible.
Do they need to be refrigerated?
Yes, because of the cream cheese. Keep them chilled unless you enjoy melted Oreo blobs.
Final Thoughts: Your New Dessert Secret Weapon
No-Bake Chocolate Oreo Truffles are the ultimate dessert hack. They look fancy, taste incredible, and take almost no time or skill to make. Honestly, they’re the kind of recipe you keep in your back pocket for when you need to impress people but secretly don’t feel like putting in the effort.
So, next time someone asks if you made these “from scratch,” just smile mysteriously and say, “Of course.” They don’t need to know your biggest struggle was not eating half the Oreo package before you started. 🙂
Now go grab some Oreos, a block of cream cheese, and a bag of chocolate chips. Trust me—you won’t regret it.