
So you’re craving cheesecake but don’t want to turn on the oven? Welcome to the club.
Cheesecake is amazing, sure. But all that baking, water baths, cracking stress, and actual effort? Hard pass. That’s why no-bake cheesecake cups exist. These little beauties give you all the creamy, dreamy cheesecake flavor without the oven anxiety. They’re portioned, pretty, and secretly the easiest dessert you’ll ever pull off.
Seriously, if you can stir and scoop, you can make these. They’re perfect for impressing guests, feeding your sweet tooth, or making it look like you tried—when you absolutely did not.
Why This Recipe is Awesome
- No oven. No drama. These live in the fridge, not the oven. Which is exactly where we like our summer desserts.
- Quick to make. Like, 15 minutes and you’re done. The rest is chill time (for both you and the cups).
- Portable and adorable. They’re served in little jars or cups, so you can take them anywhere—or just eat one in bed. No judgment.
- Customizable. Fruit? Chocolate? Crushed cookies? You do you.
- Make-ahead magic. Perfect for parties or whenever you want to pretend you’re someone who “preps ahead.”
This is one of those recipes that looks way fancier than it is. Basically, you get credit for being impressive without putting in any of the usual effort. Win.
Ingredients You’ll Need
For the crust:
- 1 cup graham cracker crumbs (or whatever crushed cookie you like)
- 2 tablespoons melted butter (the glue of dessert life)
- 1 tablespoon sugar (optional, but sweet is sweet)
For the cheesecake filling:
- 8 oz cream cheese, softened (don’t skip the softening step unless you like lumps)
- ¼ cup powdered sugar (more if you like it sweet-sweet)
- ½ teaspoon vanilla extract (because flavor)
- ½ cup heavy whipping cream (the fluff factor)
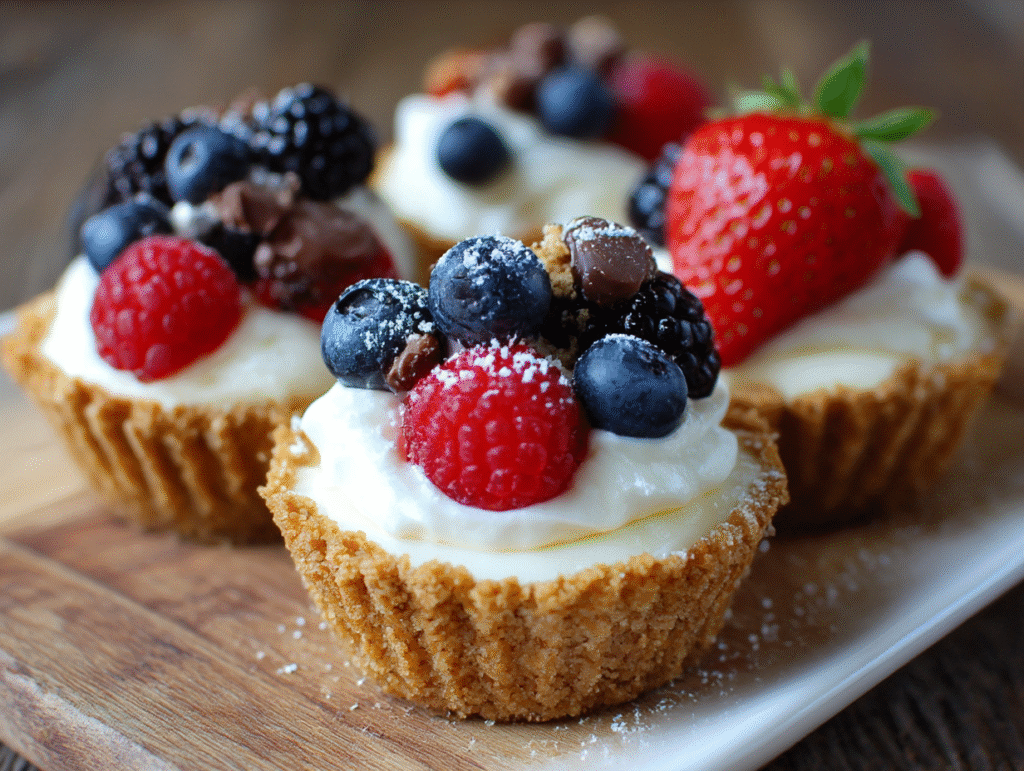
Toppings (aka the fun stuff):
- Fresh berries
- Fruit compote or jam
- Chocolate chips or ganache
- Crushed cookies
- Lemon zest, caramel, chopped nuts—you get the idea
Pick one or go full chaos mode with a mix. No rules here.
Step-by-Step Instructions
- Mix the crust. Combine graham cracker crumbs, melted butter, and sugar in a bowl. Stir until it’s like damp sand. Try not to snack on it straight from the bowl.
- Press into cups. Spoon a couple of tablespoons into each jar or serving cup. Press it down with the back of a spoon or your fingers. Chill while you make the filling.
- Beat the cream cheese. In a separate bowl, whip the softened cream cheese, powdered sugar, and vanilla until smooth and creamy. Lumps are the enemy.
- Whip the cream. In another bowl (I know, sorry), whip the heavy cream until stiff peaks form. This is where the fluffiness happens.
- Fold it together. Gently fold the whipped cream into the cream cheese mix. Don’t go wild here—you want to keep it light and airy.
- Spoon into the cups. Dollop that dreamy filling on top of the crust. Smooth the tops or swirl them like you’re on a cooking show.
- Top it off. Add berries, jam, chocolate, or whatever topping calls to your sweet little heart.
- Chill for at least 2 hours. The hardest part is waiting. But it’s worth it.
Serve cold, enjoy cold, and pretend you worked way harder than you actually did.
Common Mistakes to Avoid
- Using cold cream cheese. That’s how you get a lumpy, sad filling. Soften it first unless you’re into chunky cheesecake (no judgment… but also, don’t).
- Over-whipping the cream. If it looks like butter, you’ve gone too far. Stop at stiff peaks.
- Skipping the chill time. The fridge is what sets it all up. If you rush it, you’ll end up with cheesecake soup.
- Skimping on the crust. This isn’t a topping-only dessert. The buttery base is what makes it sing.
- Overloading the toppings. A mountain of jam or fruit might look cute, but too much can drown out the creamy middle. Balance, people.
Alternatives & Substitutions
- No graham crackers? Use Oreos, digestive biscuits, or literally any cookie you like. Go wild.
- No heavy cream? Use whipped topping like Cool Whip. It’s fine. We’re not here to gatekeep.
- Want a chocolate version? Mix cocoa powder into the filling and use crushed chocolate cookies for the crust.
- Dairy-free? Use plant-based cream cheese and coconut whipped cream. The texture holds up surprisingly well.
- Sugar-free? Use a sugar substitute and low-carb cookies for the base. Still creamy, still delicious.
These cups are like a blank canvas. Make them as classic or chaotic as you want.
FAQ (Frequently Asked Questions)
Can I make these ahead of time?
Absolutely. They keep well in the fridge for up to 3 days. Perfect for party prep or lazy Sundays.
Can I freeze them?
You can, but the texture will change a bit. Still tasty, but a little firmer. Almost like ice cream. Not a bad thing.
Do I have to use cups or jars?
Nope. You can make this in one big dish and scoop it out like a cheesecake trifle. But the cups are cuter and portion-controlled-ish.
Can I double the recipe?
Yes. And honestly, you should. These go fast.
Is this kid-friendly?
Very. Just maybe skip any fancy toppings like espresso powder or crushed almonds if you’re feeding little ones.
Can I use store-bought whipped cream?
You sure can. It’s your dessert, your rules. Just don’t forget to fold it in gently.
Is it really as good as baked cheesecake?
It’s different. Lighter, fluffier, and less dense—but still rich and indulgent. And you didn’t have to bake anything, so yeah… it’s better.
Final Thoughts
No-bake cheesecake cups are the ultimate lazy-day dessert that still brings “I made something special” energy. They’re fast, fuss-free, and dangerously good. Whether you’re entertaining guests or just treating yourself (as you should), these little cups of joy deliver every time.
So go ahead—grab your spoon, dive in, and bask in the glory of a homemade dessert that didn’t make you break a sweat. You deserve that kind of win today.