
So, you want that dreamy, creamy Cheesecake Factory cheesecake but don’t want to sell your soul to a 45-minute wait and a \$14 slice. Totally valid. The good news? You can make their iconic, melt-in-your-mouth classic cheesecake at home—no khaki-clad servers or over-laminated menus required.
Even better, this homemade version is just as indulgent, ridiculously smooth, and surprisingly not rocket science to pull off. If you can mix stuff in a bowl and not open the oven door too early, you’ve already got what it takes. Let’s make magic happen.
Why This Recipe is Awesome
- It’s basically dessert royalty. This cheesecake is rich, smooth, and has that signature tangy-vanilla thing going on that makes you forget about all other desserts.
- You’ll save like… a lot. Making this baby at home costs less than two slices from the actual Cheesecake Factory. Bonus: you get a whole cheesecake.
- Zero fancy tools required. No blowtorches, no complicated water baths (unless you’re extra). Just a mixer, a pan, and your cheesecake-loving heart.
- It freezes beautifully. You can slice and stash it in the freezer like a delicious backup plan for future dessert emergencies. And yes, those are real.
- You’ll look like a culinary genius. Serve this at a party, and suddenly you’re the friend who “bakes amazing cheesecake.” Labels matter, okay?
Ingredients You’ll Need
Nothing fancy. Just the usual cheesecake suspects:
For the crust:
- 1 1/2 cups graham cracker crumbs – Or smash a sleeve of graham crackers like it wronged you.
- 2 tablespoons sugar – Just a little sweet boost.
- 1/2 cup unsalted butter, melted – Because crusts need love too.
For the filling:
- 4 (8 oz) blocks of cream cheese, softened – Don’t cheap out. Get the full-fat stuff.
- 1 cup sugar – Sweet, but not too sweet.
- 1 teaspoon vanilla extract – The real kind. Not “vanilla flavoring.”
- 4 large eggs – Room temp is best. They mix in smoother.
- 2/3 cup sour cream – For that classic tang and creamy texture.
- 2/3 cup heavy cream – Because we’re not here to make diet cheesecake.
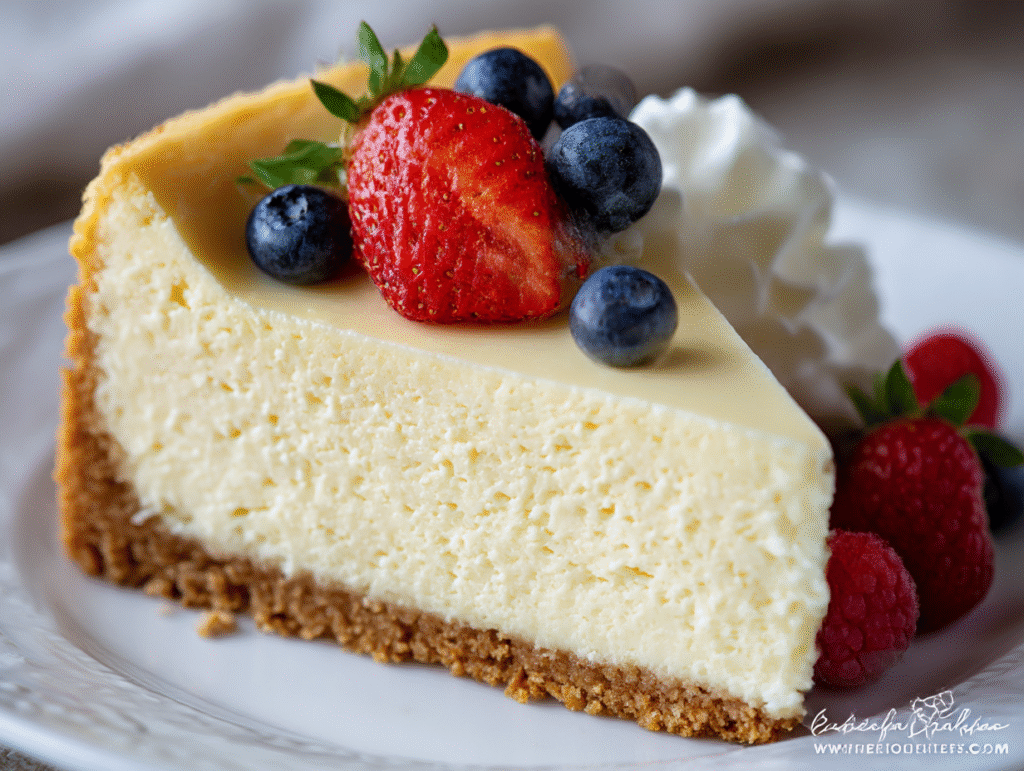
Optional toppings: Fresh berries, whipped cream, fruit sauce, or you know, straight-up nothing. It’s perfect naked too.
Step-by-Step Instructions
- Preheat your oven to 325°F (163°C).
Do this first. Don’t be the person who forgets and stares at cold cheesecake batter. - Make the crust.
Mix graham cracker crumbs, sugar, and melted butter in a bowl until it looks like damp sand. Press it into the bottom of a 9-inch springform pan. Use the bottom of a glass to get it even and compact. - Bake the crust.
Pop it in the oven for 10 minutes, then let it cool while you make the filling. This keeps it firm, not soggy. - Make the filling.
In a large bowl, beat the cream cheese until smooth and fluffy (no lumps, please). Add sugar and vanilla, beat again. Add eggs one at a time, mixing on low after each. Stir in sour cream and heavy cream last. - Pour the filling into the cooled crust.
Smooth the top like a zen garden. Tap the pan gently on the counter to release air bubbles. - Bake your cheesecake.
Wrap the bottom of the pan in foil (to prevent leaks) and place it in a larger pan with hot water halfway up the sides (a.k.a. water bath). Bake for 60–70 minutes until the edges are set but the center jiggles slightly. - Cool it slooooowly.
Turn off the oven, crack the door, and let the cheesecake sit inside for an hour. Then move it to the counter for another hour. THEN refrigerate for at least 4 hours—preferably overnight. Cheesecake needs its beauty sleep.
Common Mistakes to Avoid
- Skipping the room temperature rule.
Cold cream cheese = lumpy filling. Cold eggs = weird texture. Don’t rush it. - Overbeating the batter.
You’re making cheesecake, not whipped cream. Too much air = cracks. - Not using a water bath.
Yes, it’s a bit extra. But it keeps the heat even and prevents top cracks. It’s like a spa day for your cheesecake. - Opening the oven door mid-bake.
You’re not baking cookies. Keep it shut and trust the process. - Not letting it chill enough.
Warm cheesecake is sad cheesecake. Let it set fully or it’ll fall apart when you slice.
Alternatives & Substitutions
- Crust tweaks:
No graham crackers? Use crushed digestive biscuits, shortbread, or even Oreos (for a wild twist). Just reduce the sugar if using sweet cookies. - Dairy swaps:
Want to go lactose-free? Use lactose-free cream cheese and sour cream. It can work, but results may vary. Not a hill I’d die on. - Sweetener switches:
You can use superfine sugar or even a mix of sugar and honey for a slight flavor variation. Just don’t cut the sugar entirely—it messes with texture. - Add flavors:
Add lemon zest, swirl in raspberry puree, or drop in mini chocolate chips. It’s your cheesecake world—we’re just living in it.
FAQ (Frequently Asked Questions)
Can I skip the water bath?
Technically yes. But expect cracks. If you’re going for looks, it’s worth the hassle.
Do I need a springform pan?
Yep. Otherwise, you’ll be chiseling your cheesecake out like an archaeological dig.
Can I make this ahead?
Totally. Cheesecake tastes better the next day anyway. Make it 1–2 days in advance and chill it till serving.
Can I freeze cheesecake?
Yes! Slice it, wrap each piece well, and freeze for up to 2 months. Thaw in the fridge overnight before serving.
Why did my cheesecake crack?
Probably overmixed, overbaked, or cooled too quickly. But hey, whipped cream covers a multitude of sins.
Can I use low-fat cream cheese?
You can, but why? This is dessert. Live a little.
Do I have to use sour cream?
No, but it gives that signature Cheesecake Factory tang. Greek yogurt can work, but it’s not exactly the same.
Final Thoughts
Making the Cheesecake Factory’s classic cheesecake at home is less scary than it sounds and way more satisfying than paying for a slice. Sure, it takes some chill time (literally), but the effort-to-wow ratio is totally worth it.
So go ahead—whip this up, slice it clean, and serve it like the dessert rockstar you are. Bonus points if you don’t tell anyone it’s homemade and let them assume you smuggled it out of the actual Cheesecake Factory. Your secret’s safe here.