
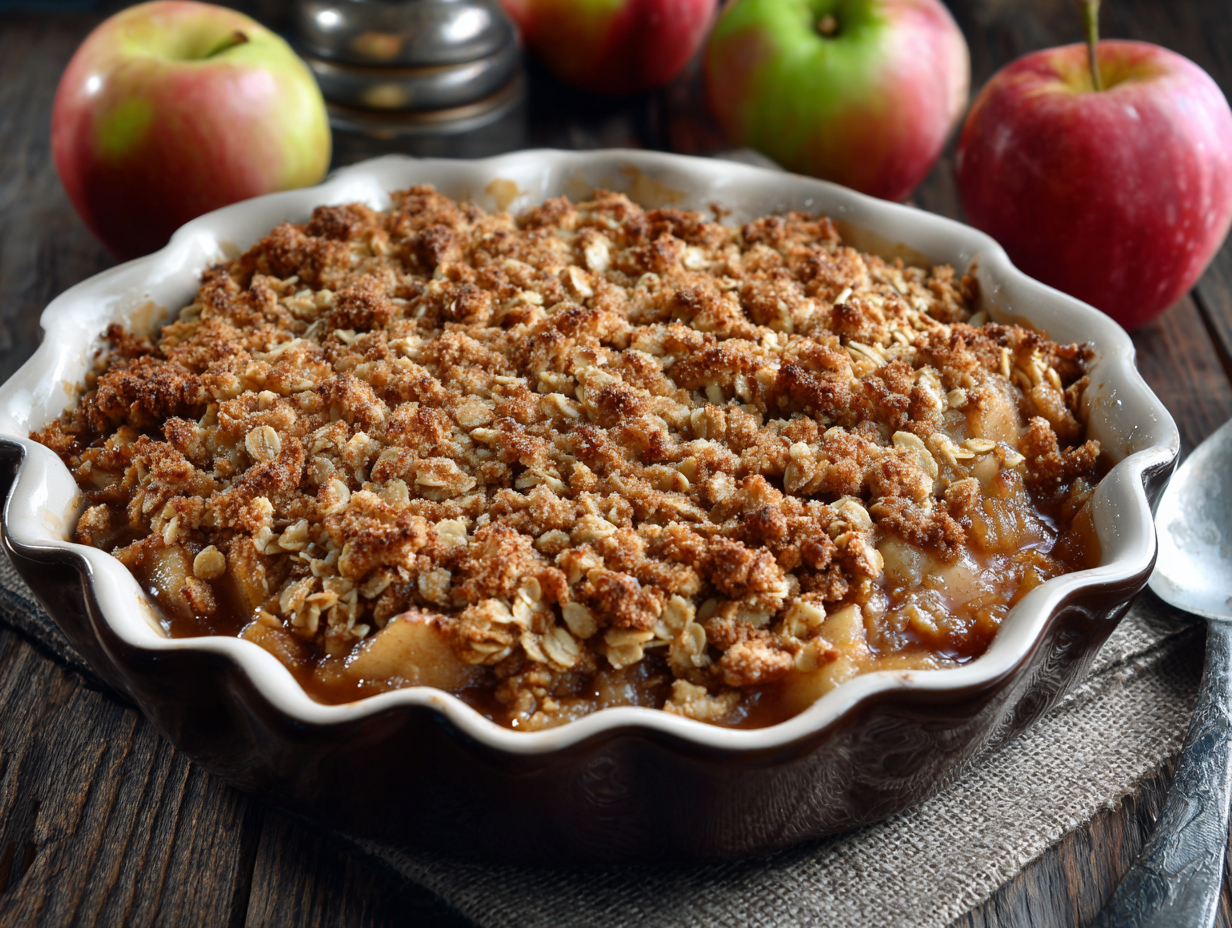
Picture this: warm, gooey apples bubbling under a golden, crunchy oat topping. It’s basically fall in a baking dish. And the best part? You don’t need to fuss with pie crusts, rolling pins, or perfectionist-level pastry skills. Apple crisp is the lazy genius of desserts—it tastes like you tried hard when in reality, you barely broke a sweat.
Why This Recipe is Awesome
First off, it’s ridiculously easy. Slice apples, toss them in sugar and spices, throw an oat topping on top, and bake. Done. Second, it’s endlessly flexible. Use any apples you’ve got, play around with spices, or toss in extras like cranberries or nuts. Third, the smell. Seriously, your kitchen will smell like a bakery and a candle store had a baby. If that doesn’t convince you, I don’t know what will.
Ingredients You’ll Need
- Apples (Granny Smith, Honeycrisp, or a mix—whatever’s hanging out in your fruit bowl)
- Lemon juice (to keep apples bright and zesty)
- Granulated sugar (for sweetness)
- Brown sugar (for that molasses depth)
- Ground cinnamon (the real MVP of fall desserts)
- Ground nutmeg (optional, but adds warmth)
- Rolled oats (for the crunchy topping)
- All-purpose flour (to bind the crisp)
- Unsalted butter (cold, cubed, and ready to crumble)
- Salt (tiny pinch for balance)
Step-by-Step Instructions
- Preheat your oven. 350°F (175°C). Get it hot and ready.
- Prep the apples. Peel (if you want), core, and slice them. Toss with lemon juice, sugar, cinnamon, and nutmeg. Spread into a baking dish.
- Make the topping. In a bowl, combine oats, flour, brown sugar, salt, and butter. Use your hands or a pastry cutter to mix until crumbly and clumpy.
- Assemble. Sprinkle the oat topping evenly over the apples. No need for perfection—it’s supposed to look rustic.
- Bake. About 40–45 minutes, until the apples are tender and the topping is golden brown. If your house doesn’t smell amazing by now, something’s wrong.
- Cool slightly. Let it rest for 10 minutes so you don’t scorch your tongue.
- Serve. Plain is great, but vanilla ice cream or whipped cream takes it to “why didn’t I make this sooner?” territory.
Common Mistakes to Avoid
- Too much lemon juice. A splash is fine, but don’t drown your apples in it unless you’re going for apple soup.
- Overmixing the topping. You want chunky crumbles, not sand. Big lumps = crunchy bites.
- Using mushy apples. Soft apples will turn to applesauce. Go for firm ones so they hold up in the oven.
- Skipping the rest time. It’s molten lava when it comes out. Give it a minute.
Alternatives & Substitutions
- Gluten-free? Swap flour for almond flour or a gluten-free blend.
- Dairy-free? Coconut oil or vegan butter works instead of regular butter.
- Mix it up. Add cranberries, pears, or even peaches for variety.
- Nut lover? Toss in pecans or walnuts into the topping for extra crunch.
- Low sugar? Cut down the sugar and let the apples shine. Some varieties are sweet enough on their own.
FAQ (Frequently Asked Questions)
Do I have to peel the apples? Nope. Keep the peels for extra fiber and rustic vibes, or peel if you want smooth bites.
Can I make this ahead? Yes—assemble and refrigerate the unbaked crisp for up to 24 hours. Bake when ready.
Can I freeze apple crisp? Totally. Bake it first, cool, then freeze. Reheat in the oven to crisp it back up.
What kind of apples work best? Firm, tart-sweet ones like Granny Smith or Honeycrisp. Mix varieties for more depth.
Can I make it in a cast iron skillet? Yes, and it looks extra cozy when you serve it straight from the pan.
Is this healthier than pie? Let’s just say it has oats, so you can call it “breakfast” and feel good about it.
Final Thoughts
This apple crisp with oat topping is the dessert you make when you want something comforting, low-effort, and crowd-pleasing. It’s got everything: gooey fruit, crunchy topping, and that nostalgic, cozy flavor that screams fall. Plus, it’s so forgiving you could probably eyeball half the ingredients and still end up with something delicious.
So, next time you’re staring at a pile of apples wondering what to do, skip the pie drama and make this instead. Your taste buds (and whoever you share it with) will thank you.