
So, you want something sweet, cozy, and autumn-y but don’t feel like babysitting a pie in the oven for an hour? Enter: pumpkin butter bars. These bad boys taste like pumpkin pie’s cooler, more laid-back cousin who shows up to the party in a flannel shirt with zero stress and maximum flavor. They’re creamy, spiced, buttery, and honestly… dangerously addictive. Don’t say I didn’t warn you.
Why This Recipe is Awesome
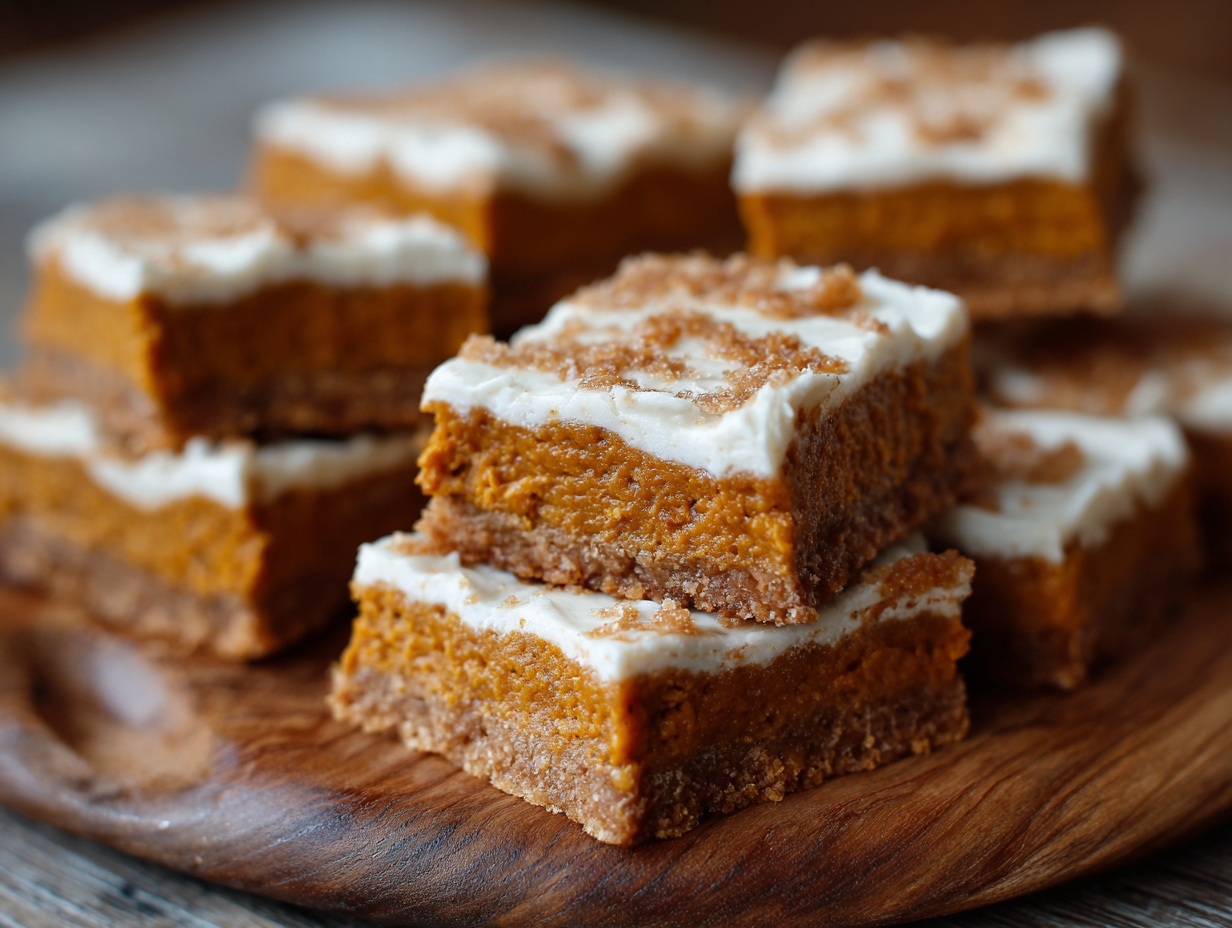
Let’s start with the obvious: these bars are basically pumpkin pie without the drama. No rolling dough, no praying your crust doesn’t shrink, no pie slices collapsing into sad orange puddles. Instead, you get a buttery cake mix crust on the bottom, a luscious pumpkin custard in the middle, and a sweet, crumbly topping that’s so good you’ll have to guard it from “just one more bite” thieves in your kitchen.
Also, it’s idiot-proof. Truly. You dump, spread, bake, and chill. That’s it. The hardest part is waiting for them to cool enough so you don’t burn your tongue on molten pumpkin filling (don’t ask how I know). These bars are perfect for parties, potlucks, Thanksgiving dessert tables, or, let’s be real, late-night fridge raids.
Ingredients You’ll Need
For the crust and topping:
- 1 box yellow cake mix (yes, boxed cake mix—don’t fight it, just embrace the convenience)
- 1/2 cup unsalted butter, melted (aka liquid gold)
- 1 large egg (holds everything together like culinary glue)
For the filling:
- 1 (15-ounce) can pumpkin purée (not pumpkin pie filling—don’t get tricked)
- 2 large eggs (more glue, more structure, more deliciousness)
- 1 (14-ounce) can sweetened condensed milk (this is what makes it creamy-dreamy)
- 1/2 cup brown sugar (for that caramel-y depth)
- 1 teaspoon vanilla extract (because vanilla makes everything better)
- 2 teaspoons pumpkin pie spice (aka the spice of autumn life)
- Pinch of salt (because even dessert needs balance)
Step-by-Step Instructions
- Preheat your oven to 350°F (175°C). Grease a 9×13-inch baking dish, because nothing ruins dessert faster than welded-on crust.
- In a bowl, mix the cake mix, melted butter, and 1 egg. Stir until crumbly but moist enough to hold together. Press about 2/3 of this mixture into the bottom of the pan to form the crust. Save the rest for later—it’s going to be your crumbly topping.
- In another bowl, whisk together the pumpkin, eggs, condensed milk, brown sugar, vanilla, pumpkin spice, and salt until it’s smoother than your best dance moves.
- Pour the pumpkin mixture over the crust. Spread it evenly so you don’t end up with weird lopsided bars.
- Crumble the reserved cake mix mixture over the top. Don’t worry if it looks uneven—that’s what makes it look rustic (aka professional chef code for “I didn’t stress about it”).
- Bake for 40–45 minutes, until the filling is set and the topping is golden. The center should jiggle slightly, but not look like soup.
- Cool completely before cutting into squares. Yes, this is the hardest step, but trust me—it’s worth it. If you cut too soon, you’ll have pumpkin goo bars instead of pumpkin butter bars.
Common Mistakes to Avoid
- Using pumpkin pie filling instead of purée. Rookie move. The pie filling already has sugar and spices, and your bars will taste like chaos.
- Forgetting to save some crust mixture for the topping. It happens, but then you’ll end up with a sad topping-less bar. And nobody wants that.
- Overbaking. The bars should still jiggle a little in the middle. If you wait for it to look bone-dry, congrats, you just made pumpkin jerky.
- Cutting too early. I get it, the smell is irresistible. But wait until it cools—unless molten pumpkin lava sounds fun.
Alternatives & Substitutions
- No yellow cake mix? Try spice cake mix for extra flavor, or white cake mix if that’s what’s hiding in your pantry.
- Not into sweetened condensed milk? You can sub evaporated milk plus 3/4 cup sugar, but honestly, condensed milk is the secret magic here.
- Want it less sweet? Cut the brown sugar in half or skip sprinkling powdered sugar on top later.
- Need it gluten-free? Use a gluten-free cake mix—problem solved.
- Feeling fancy? Top with a drizzle of caramel sauce, whipped cream, or even cream cheese frosting. (Not necessary, but absolutely not discouraged either.)
FAQ (Frequently Asked Questions)
Can I make these ahead of time?
Absolutely. They’re even better the next day once the flavors have had time to mingle.
Do these need to be refrigerated?
Yes. Because of the custard-y pumpkin filling, store them in the fridge. But don’t worry—they taste amazing chilled.
Can I freeze pumpkin butter bars?
For sure. Freeze them in an airtight container, and thaw in the fridge before serving. They hold up surprisingly well.
Can I use fresh pumpkin instead of canned?
Yes, but only if you purée it really smooth and cook off excess liquid. Otherwise, your bars might end up soggy.
Can I use margarine instead of butter?
Technically yes, but honestly… why? Butter makes everything better. Don’t deprive yourself.
What’s the best way to cut them cleanly?
Use a sharp knife, wipe it between cuts, and wait until they’re fully cooled (or even chilled). No messy pumpkin bar crime scenes that way.
Can I double the recipe?
Yes, but use two pans. Otherwise, the center will take forever to cook, and your edges might burn.
Final Thoughts
Pumpkin butter bars are the ultimate low-effort, high-reward dessert. They’re creamy, sweet, spiced, and perfect for fall—or really any time you’re craving pumpkin pie vibes without committing to actual pie. They’re the kind of dessert that makes people think you went all out when in reality, you mostly dumped ingredients into a bowl and called it a day.
So, go ahead and whip up a batch. Cut them into squares, stack them on a plate, and watch them vanish. Or, keep them all for yourself—I’m not judging. Either way, these bars will make you the hero of dessert time with minimal stress. And isn’t that the dream?